
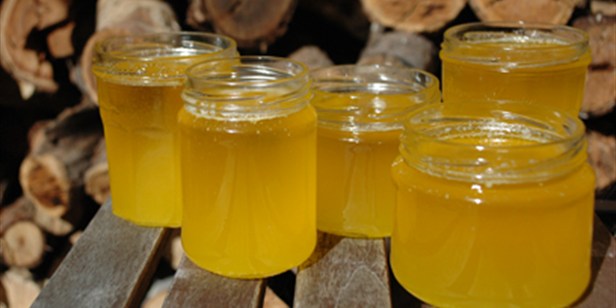
Ghee - Clarified butter
Making ghee is neither
difficult nor complicated, but it does take some time. Bringing out the sweet,
nutlike flavor of the melted butter requires long, slow cooking to fully
evaporate the water and allow the milk solids to separate and float to the
surface leaving clear, amber-colored ghee.
Begin by heating the
butter in a large heavy saucepan over medium heat until it comes to a boil.
When the surface of the butter is covered with a white foam, reduce the heat to
as low as possible and simmer uncovered. From time to time remove the solids
that accumulate on the surface. Make sure the ghee doesn't burn. If ghee
is cooked over too high a heat or cooked too long, it will darken and give
off apungent odor.
How much time you need for
preparing the ghee depends on how much you are making (see table below).
The finished ghee should be golden-colored and clear enough to see
through to the bottom of the saucepan. Carefully ladle the ghee into a
can or crock and allow it to cool uncovered to room temperature. The milk
solids skimmed off the surface and the solids remaining in the bottom of the
pan can be mixed into cooked vegetables, soups, and grains.
Ghee properly prepared and stored in closed containers
in a cool dry place will keep for months.
Quantity of butter
|
Cooking time
|
Yield of ghee
|
2 Ibs (1 kg)
|
1/2 hr
|
1 3/4 Ibs (800 g)
|
5 Ibs (2.5 kg)
|
3 hrs
|
4 1/2 Ibs (2.2 kg)
|
10 lbs (5 kg)
|
5 hrs
|
9 Ibs (4.6 kg)
|
• There are two types of ghee:
usli ghee and vegetable ghee. When we refer to ghee in this
book, we always mean usli ghee, or genuine ghee, which is
clarified butter and can be made at home. Vegetable ghee is a
combination of various vegetable oils and can be bought in large cans.
Vegetable ghee may be less expensive and lighter, but it can never compare to real ghee for flavor.
Vegetable ghee may be less expensive and lighter, but it can never compare to real ghee for flavor.
• Ghee is pure butterfat. Since it is has no milk solids
to turn rancid, it will keep for months, even without refrigeration.
• All ingredients to be
deep-fried should be prepared, shaped, cut, or rolled close at hand, and at
room temperature. When using ghee to pan-fry spices, gather all the
spices first, so that the ghee doesn't burn while you're looking for
them.
• Before putting ghee in
a pan for deep-frying, make sure the pan is perfectly dry. Avoid mixing or
splashing water into hot ghee. The ghee will splatter violently.
• The ghee may foam
when moist vegetables are deep-fried, so leave enough space at the top of the
pan to prevent spilling over. You can tell if the ghee is hot enough for
deep-frying when a morsel of food dropped into it rises immediately to the
surface and sizzles. Then lower the heat just enough to keep the ghee from
burning.
• If the ghee is too
hot, it darkens and burns the outside of the food, leaving the inside
undercooked; if it's not hot enough, your food will soak up too much ghee and
become greasy. Cover the surface of the ghee with only one layer of
food, leaving enough space for the food to move. Too much food put into the ghee
at one time will lower the temperature.
• To conserve ghee, which
devotees sometimes call "liquid gold," drain the fried foods in a
colander or strainer placed over a pan to catch the drippings. Filter the ghee
through several layers of paper towels or a fine sieve before using it
again, otherwise residues from the previous cooking will burn, discoloring the ghee
and altering its flavor.
• For deep-frying, you can
use the same ghee for several weeks, as long as it isn't burned. If the ghee
stays dark even after being filtered, or if it gives off a pungent odor, it
should be discarded.

No comments:
Post a Comment